Welcome to the Dynamic Rendezvous Points with Auto-RP lab, where you’ll explore how PIM Sparse-Mode networks dynamically discover and use Rendezvous Points without relying on static configuration. In this hands-on lab, you’ll step through the complete Auto-RP process—preparing the network, configuring RP-Candidates and a Mapping Agent, and observing how RP information is advertised, discovered, and used across the topology. Along the way, you’ll pause to predict behavior, verify control-plane operation, and even use Wireshark to watch Auto-RP messages on the wire, building an intuitive understanding of how modern IOS handles dynamic RP discovery.
Take this as a guided walk-through rather than an answer key.
If something you predicted didn’t match reality — that’s not a mistake, that’s learning doing its job.
R2 through R9

ip multicast-routing
!
interface range gigabit0/0 - 3
 ip pim sparse-dense-mode
 exit
!
ip pim autorp listener
Multicast Receivers

MCAST-RCVR-1

interface gig0/2
 ip igmp join-group 225.9.9.9
 end

MCAST-RCVR-2 & MCAST-RCVR-3

interface gig0/3
 ip igmp join-group 225.9.9.9
 end
R2 (AutoRP Candidate Router)

config t
ip pim send-rp-announce Loopback0 scope 16
end
R4 (AutoRP Mapping Agent)
config t
ip pim send-rp-discovery Loopback0 scope 16
endip multicast-routing is enabled everywhereOn any router, check:
show ip pim rpYou should see output indicating no RP is configured or learned.
With PIM enabled on router interfaces but no RP information available, multicast traffic cannot be forwarded beyond the first-hop router.
Why?
Your intuition that “something important is missing” was exactly right — that missing piece is RP knowledge.
Auto-RP uses two globally scoped multicast addresses:
| Purpose | Multicast Address | Transport |
|---|---|---|
| RP-Announce | 224.0.1.39 | UDP 496 |
| RP-Discovery | 224.0.1.40 | UDP 496 |
These are not link-local (224.0.0.x) addresses.
Because these groups are routable:
If your interfaces had been configured for PIM Sparse-Mode only, Auto-RP messages would not propagate.
Sparse-Mode requires: - A known RP - Existing multicast state
Auto-RP exists precisely to create RP knowledge — so it can’t bootstrap itself using Sparse-Mode alone.
This is the classic Auto-RP chicken-and-egg problem.
On all multicast-participating interfaces, if you had initially applied only Sparse-Mode you needed to make a change:
ip pim sparse-modeto:
ip pim sparse-dense-modeSparse-Dense mode behaves as follows:
Auto-RP messages are flooded using Dense-Mode behavior, which allows:
to reach every router before any RP exists.
This is temporary scaffolding — once the RP is learned, the network naturally behaves like pure Sparse-Mode again.
ip pim autorp listener Is RequiredIn this lab, Auto-RP did not function until ip pim autorp listener was configured on both the RP (R2) and intermediate routers such as R7. This behavior is expected in modern IOS.
Without the Auto-RP listener enabled:
This is why (if you had neglected to add this command to at least routers R2 and R7) you would have seen in subsequent steps that R2 failed to recognize itself as the RP and subsequently rejected:
Once ip pim autorp listener was enabled on all routers participating in Auto-RP forwarding, RP-Discovery messages propagated correctly and the multicast control plane converged as expected.
Key takeaway:
Auto-RP now requires explicit participation from every router involved, not just RP-Candidates or Mapping Agents.
R2 already has Loopback0 at 2.2.2.2/32.
Configure it as the RP Candidate (example scope shown; your lab may choose a different TTL):
conf t
ip pim send-rp-announce Loopback0 scope 16
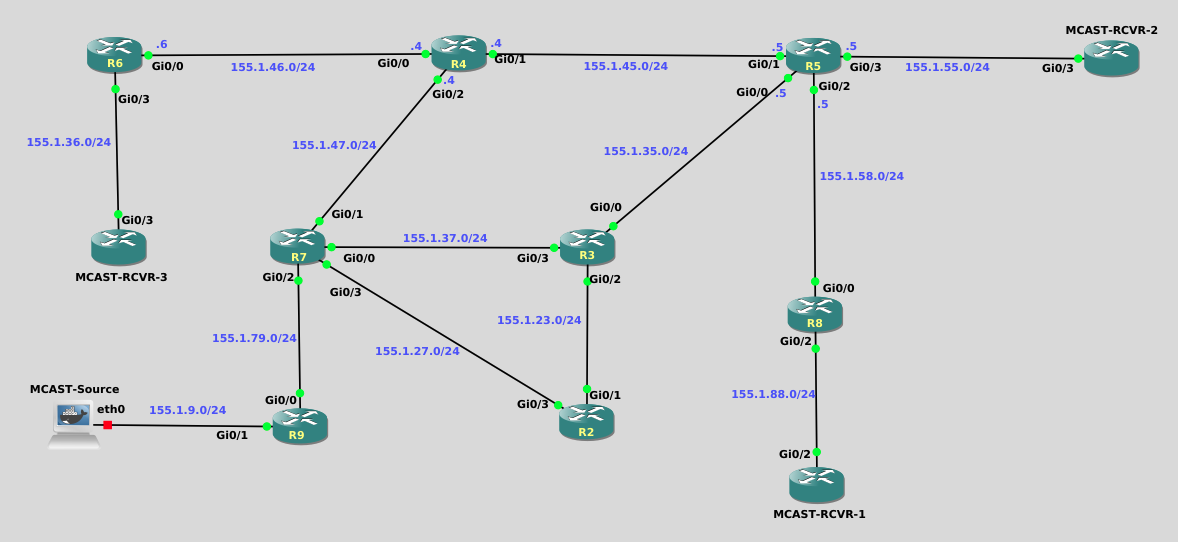
endImportant factual behaviors: - Announcements are sent about every 60 seconds - The advertised holdtime is typically 180 seconds - RP-Announce messages are sent to 224.0.1.39 using UDP port 496
In GNS3: - Right-click the R2–R3 link - Choose Start Capture - Wireshark opens
What you should see: - Destination multicast 224.0.1.39 - UDP traffic (port 496) - Source IP matching the interface you used in the RP-Announce command (Loopback0 ⇒ 2.2.2.2)
Even though R2 is announcing itself, no router learns an RP yet.
Why? - Only a Mapping Agent actually processes RP-Announce messages. - Other routers treat the traffic like “flood this along,” not “learn from this.”
So yes — it still feels incomplete, because it is incomplete (on purpose!).
R4 already has Loopback0 at 4.4.4.4/32.
Configure Mapping Agent behavior (example scope shown):
conf t
 ip pim send-rp-discovery Loopback0 scope 16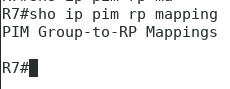
endIn GNS3: - Right-click the R4–R7 link - Choose Start Capture
What you should see: - Destination multicast 224.0.1.40 - UDP traffic (port 496) - Discovery messages being flooded through the domain
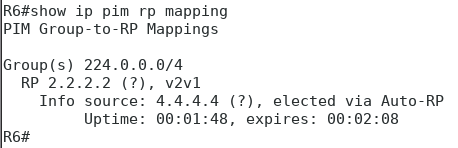
On multiple routers, check:
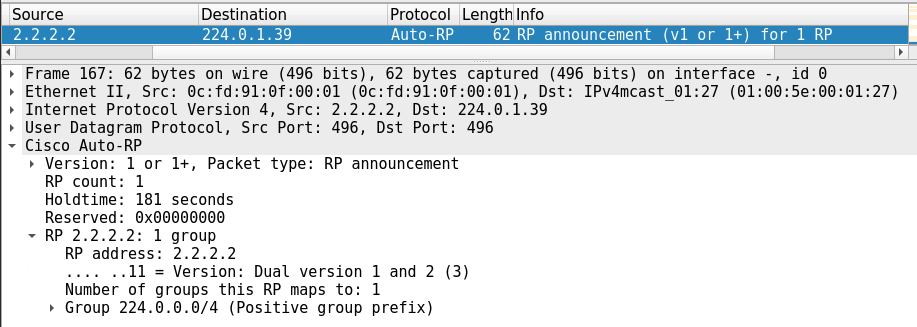
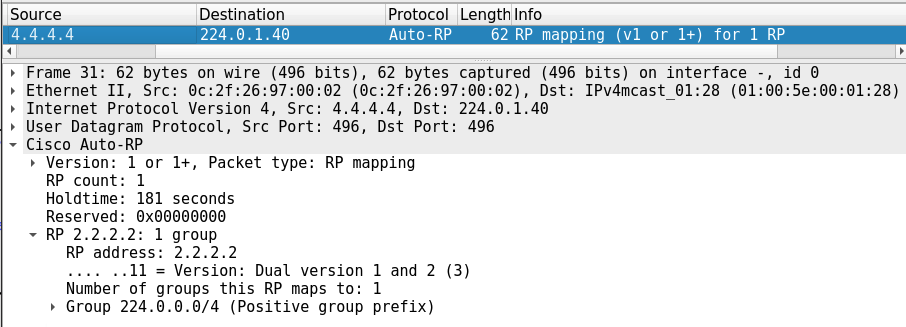
show ip pim rp mapping
show ip pim rp
You should see the RP learned via Auto-RP for the group range, with the RP pointing to 2.2.2.2 (R2’s loopback).
With Auto-RP: - The Mapping Agent makes the RP decision - Other routers learn and follow it - Routers do not independently compute an RP choice (that’s a PIM-BSR thing)
Once a receiver joins a group, the last-hop router will begin building state using the RP.
✅ Shared Tree (RPT) forms first.
Why? - In PIM Sparse-Mode, the initial join is (*,G) toward the RP. - That creates the shared tree before any shortest-path decisions are made.
Depending on platform defaults and traffic conditions, you may later see SPT activity, but the first step is the shared tree.
On relevant routers:
show ip mroute
show ip pim rp mapping
show ip pim neighborIf Auto-RP feels less “mysterious” now, you did it right.
If you want to deepen intuition next, a fun follow-up is: - Add a second RP candidate - Watch how the Mapping Agent selects (and how routers react if discovery messages differ)